
A single crushed shoebox can cost you a customer forever. If you’re running an online store, selling sneakers on eBay, or just sending a pair of heels to your sister across the country, you already know that shoes aren’t as “tough” as people think. Leather creases. Suede scuffs. Heels snap. And one badly packed parcel can turn a $200 pair of Jordans into a return request.
The frustrating part? Most shoe damage during shipping is 100% preventable. You just need to know the right box, the right stuffing, and the right courier method. That’s exactly what this guide covers — no fluff, just practical steps you can follow today to ship shoes and footwear safely, whether it’s a local delivery or an international shipment.
Why Shoes Need Special Attention During Shipping
You might wonder — shoes are sturdy items, right? They handle rain, rough roads, and daily wear. Why would a courier ride damage them?
Here’s the thing: shoes are designed to handle pressure from the top (your body weight pressing down). They’re NOT designed to handle pressure from the sides, random impacts, or being stacked under heavy parcels. That’s exactly what happens inside a delivery truck or a cargo hold.
Specific risks during transit include the sole separating from the upper if the box gets crushed, heel tips snapping off on dress shoes, leather and suede getting scuffed against rough cardboard, the original shoebox itself getting destroyed (which matters a LOT for resale value on platforms like StockX or GOAT), and moisture damage if the parcel passes through humid conditions.
Pro Tip: If you’re selling sneakers or collectible footwear, the condition of the original shoebox can affect the resale price by 10–20%. Treat the box as part of the product, not just packaging.
Understanding these risks upfront means you’ll pack smarter. And smart packing isn’t complicated — it just requires a few deliberate choices.
Choosing the Right Box for Shipping Shoes
This is where most people make their first mistake. They either ship shoes in the original shoebox alone (bad idea) or grab whatever random box they find lying around (worse idea).
The Original Shoebox Isn’t Enough
The shoebox your shoes came in was designed for retail display and short-term storage. It wasn’t built to survive being tossed around in a sorting facility. Shoeboxes are made from thin, single-wall cardboard — they’ll crush under even moderate pressure.
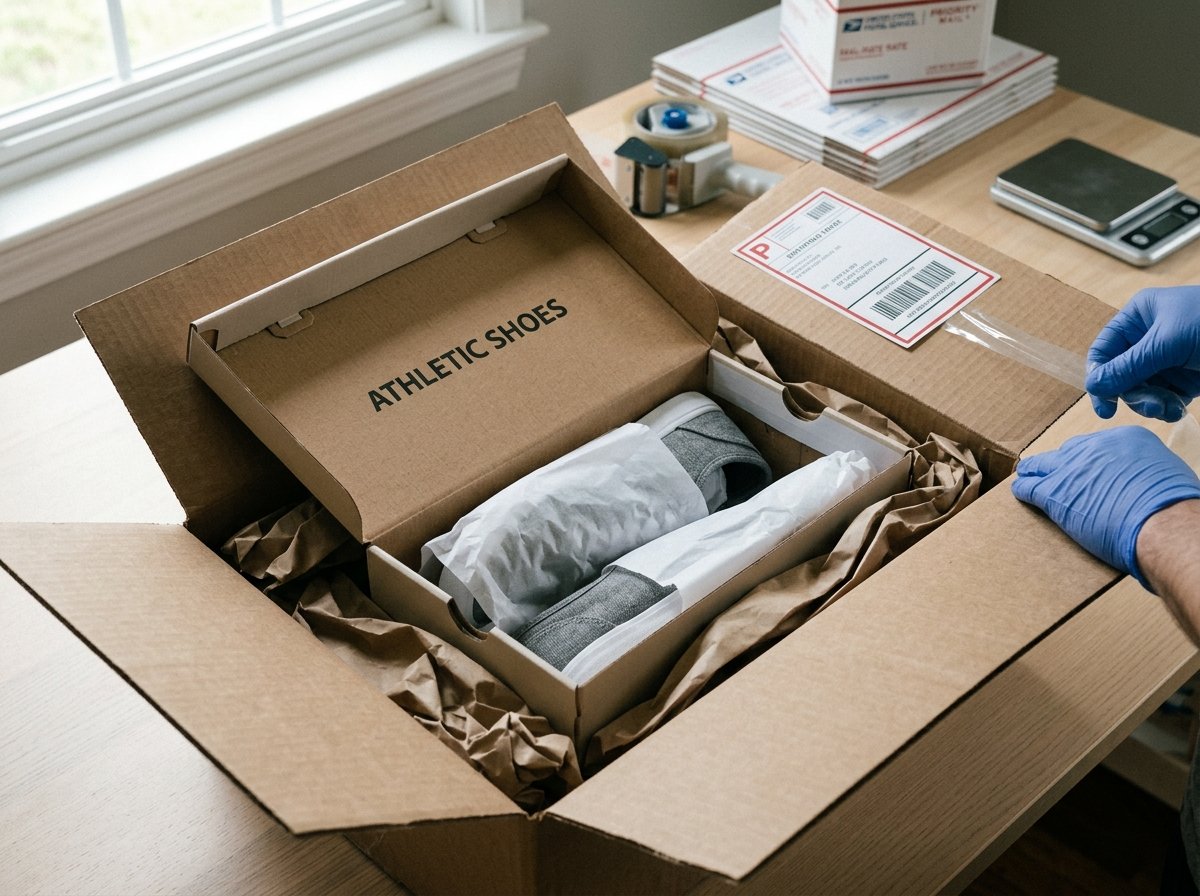
So what do you do? You use the shoebox as inner packaging and place it inside a slightly larger, sturdier shipping box. Think of it as a box-in-a-box method.
What Size Shipping Box Do You Need?
The outer box should be about 2–3 inches larger than the shoebox on every side. This gap gives you room for cushioning material. Too tight, and there’s no protection. Too loose, and the shoebox rattles around inside — both situations lead to damage.
If you’re not sure how to pick the perfect size, this guide on choosing the right box size for your shipment breaks it down really well.
No Shoebox? No Problem.
Sometimes you’re shipping shoes without the original box — maybe they’re used, vintage, or the box got tossed. That’s fine. Wrap each shoe individually in tissue paper first, then bubble wrap. Place them sole-to-sole (bottoms facing each other) and wrap the pair together. Then put them in a corrugated shipping box with plenty of cushioning.
Quick Fact: Corrugated cardboard boxes with double-wall construction can handle up to 60–80 lbs of stacking weight, compared to single-wall boxes that max out around 20–30 lbs. For shoe shipping, single-wall corrugated usually works unless you’re shipping heavy boots.
How to Pack Shoes for Shipping — Step by Step
Let’s walk through the actual packing process. This works for sneakers, dress shoes, boots, sandals, and most footwear types.
Step 1: Stuff the Shoes
Before you wrap anything, stuff each shoe with tissue paper or packing paper. This does two things — it helps the shoe hold its shape during transit, and it prevents the toe box from collapsing if pressure hits the front.
For tall boots, stuff the shaft area too. You can use rolled-up paper or even a small piece of cardboard bent into a cylinder shape to keep the shaft upright.
Avoid using newspaper for stuffing. The ink can transfer onto the shoe lining, especially on lighter-colored footwear. Plain white tissue paper or brown packing paper works best.
Step 2: Wrap Each Shoe Individually
Take each shoe and wrap it in tissue paper first (this protects the surface finish), then wrap it in a layer of bubble wrap. If you’re working with patent leather, suede, or any delicate material, the tissue paper layer is non-negotiable — bubble wrap texture can leave impressions on soft materials.
Not sure how much bubble wrap you actually need for proper protection? One full wrap around each shoe with about 2 inches of overlap is generally enough. You don’t need to mummify them.
Step 3: Place Shoes in the Shoebox (If Available)
Put the wrapped shoes back in the original shoebox. If there’s any movement when you gently shake the box, add more tissue paper in the gaps. The shoes shouldn’t shift at all inside the shoebox.
Close the shoebox lid and tape it shut with regular tape. Don’t use packing tape directly on the shoebox if preserving the box matters for resale — the adhesive can tear the printed surface when removed. Painter’s tape or rubber bands work as alternatives.
Step 4: Cushion the Outer Box
Place a 2-inch layer of cushioning at the bottom of your shipping box. Crumpled packing paper, bubble wrap, or even eco-friendly packaging materials like biodegradable packing peanuts all work great here.
Set the shoebox on top of this layer, centered in the outer box. Fill the remaining gaps on all sides and on top with more cushioning. The goal is simple: when you close the outer box and shake it, nothing should move.
Step 5: Seal and Label
Close the outer box and seal it with strong packing tape — run at least two strips along the center seam and one strip along each edge seam (the H-taping method). This prevents the box from popping open during handling.
Attach your shipping label on the top surface. If you’re shipping internationally, your customs forms go in a clear adhesive pouch on the outside. Make sure the label isn’t placed over a seam — it could tear during transit.
Warning: Don’t use duct tape, masking tape, or string for sealing. Many couriers reject parcels sealed with these materials because they jam automated sorting machines.
Special Packing Tips by Shoe Type
Not all shoes pack the same way. A pair of flip-flops and a pair of knee-high leather boots need very different approaches.
Sneakers and Athletic Shoes
These are the easiest to pack. Stuff them, wrap them, box them. One thing to watch — if the sneakers have a chunky or raised sole (like Nike Air Max or platform shoes), make sure the cushioning around the sole area is extra snug. That’s the most vulnerable spot for sole separation during impact.
High Heels and Dress Shoes
Heels are fragile — especially stiletto tips. Wrap each heel individually with bubble wrap, almost like putting a little sleeve on the heel. For pointed-toe dress shoes, add extra tissue paper in the toe area so the point doesn’t get bent or crushed.
Boots (Ankle and Knee-High)
Boots take up more space, so you’ll likely need a larger box. Stuff the shaft with paper or cardboard rolls. If the boots have buckles or hardware, wrap those elements with extra tissue paper to prevent scratching the leather surface.
Sandals and Flip-Flops
Lightweight and flexible, sandals are easier to ship but prone to strap damage. Wrap any beading, embellishments, or thin straps with tissue paper. For sandals with raised embellishments, place them sole-to-sole and wrap together so the decorations face outward, away from friction points.
Cleats and Specialty Athletic Footwear
Here’s a tip most people miss — cover the spike/stud area of cleats with a piece of cardboard before wrapping. The spikes can puncture bubble wrap and even poke through the box if not covered properly.
Choosing the Right Shipping Method
Once your shoes are packed properly, you need to pick the right courier and service level. Your choice depends on three things: speed, destination, and value of the shoes.
Domestic Shipping
For standard shoe shipments within your country, ground shipping is usually the most cost-effective. Most shoes weigh between 1–4 lbs packed, so rates stay reasonable. If you want to understand the trade-offs better, check this breakdown of ground vs air shipping pros and cons.
If the buyer needs shoes urgently — say, for an event — upgrading to next-day or same-day delivery is worth the extra cost. Just make sure you still pack them properly even when you’re rushing.
International Shipping
Shipping shoes internationally adds a few extra layers of complexity. Customs declarations, potential import duties, and longer transit times all come into play.
For international footwear shipments, you’ll need to declare the shoe material (leather, synthetic, textile) on your customs form. Some countries classify leather differently, affecting duty rates. If you’re shipping to specific markets, reviewing shipping restrictions to the USA or shipping restrictions to the UK can save you from unexpected customs headaches.
Did You Know? Leather shoes imported into the EU can face tariffs ranging from 3% to 17%, depending on the specific material composition. Synthetic footwear generally has lower duty rates. Declaring materials accurately on your customs form prevents delays and extra charges.
Courier Comparison
Which courier is better for shoes? It really depends on your location and shipment size. DHL, FedEx, UPS, USPS (in the US), Royal Mail and Parcelforce (in the UK) all handle footwear shipments. If you’re comparing options for international orders, this DHL vs FedEx comparison gives you a clear picture of pricing, speed, and reliability between the two biggest players.
Shipping Shoes for Resale: Extra Precautions
If you sell shoes on eBay, StockX, GOAT, Poshmark, or Etsy, your packaging standards need to be higher than someone just sending shoes to a friend. Why? Because buyers in the resale market are paying for condition. A creased shoebox or a scuffed toe can mean a return, a bad review, or a rejected authentication.
Protect the Shoebox Like It’s the Product
For resale, wrap the entire shoebox in plastic wrap (cling film) before placing it in the outer box. This protects the shoebox from moisture and minor scuffs. Some sellers use large Ziploc bags instead — both methods work.
Document Everything
Before shipping, take photos of the shoes from multiple angles and the packaging process. If a buyer claims damage, you have proof of how the shoes looked when they left your hands. This is especially useful when handling returns for your online business.
Consider Shipping Insurance
For shoes valued over $100, adding shipping insurance is a smart move. If the parcel gets lost or damaged, you’re covered. Most major couriers offer insurance at the point of purchase, and you can learn more about insurance options for shipped packages to decide how much coverage you need.
If you’re actively selling footwear online and shipping regularly, this eBay seller’s guide to international shipping covers the logistics side of running a footwear resale business.
Common Packing Mistakes That Ruin Shoes in Transit
Let me save you from the errors I’ve seen sellers and shippers make over and over again.
Using a box that’s too big without enough fill. The shoes bounce around like a pinball during sorting. Crushed toes, separated soles, and scuffed surfaces are the result. If you hear anything moving when you shake the sealed box, you need more cushioning.
Skipping the tissue paper layer. Bubble wrap directly on leather or suede leaves textured impressions, especially in warm weather when the material softens slightly. Tissue paper creates a smooth barrier that takes two seconds to add.
Shipping without a tracking number. This isn’t a packing mistake, but it’s a shipping mistake that causes just as much grief. Always ship with tracking. If a parcel goes missing and you can’t prove delivery, you’re on the hook — especially for seller platforms. Knowing how to understand tracking statuses helps you keep an eye on your parcel’s journey and spot delays early.
Ignoring dimensional weight pricing. Shoes are lightweight but take up space. Most couriers now charge based on dimensional weight (the size of the box) rather than actual weight — whichever is higher. So using an oversized box doesn’t just risk damage; it also costs you more. Understanding how dimensional weight works can save you real money on shipping costs.
For a deeper look at packaging errors that cause damage across all product types, this article on common packaging mistakes that damage parcels is worth a read.
How Much Does It Cost to Ship Shoes?
Cost varies based on destination, box dimensions, weight, and courier. But here are some ballpark numbers for 2025 to give you a rough idea.
For domestic shipping in the US, a standard pair of sneakers in a properly sized box typically costs between $8–$18 via USPS Ground Advantage, $12–$25 via UPS Ground, and $10–$22 via FedEx Ground. Priority or express options push these ranges higher.
For international shipments, expect to pay $25–$70+ depending on the destination country, box size, and service speed. Asian and European destinations from the US tend to fall in the $35–$55 range for standard international services.
Pro Tip: If you’re shipping multiple pairs or running a business, bulk shipping discounts from couriers can cut your per-parcel cost significantly. Most couriers offer volume-based pricing once you cross 20–50 shipments per month.
FAQ Section
Can I ship shoes in just the shoebox without an outer box?
You can, but you shouldn’t. The original shoebox is thin cardboard designed for shelf storage, not for surviving conveyor belts, truck stacking, and rough handling. Shipping without an outer box almost guarantees the shoebox will arrive dented, torn, or crushed. Always use the box-in-a-box method for safe delivery.
What’s the cheapest way to ship shoes?
For domestic US shipping, USPS Ground Advantage is usually the most affordable option for a standard shoe-sized package. If you’re comparing multiple couriers, using a shipping rate comparison tool helps. The cheapest method also depends on your box dimensions — a smaller, well-fitted box means lower dimensional weight charges. You can explore how shipping rates are actually calculated to find the best deal.
Do I need to declare shoe material for international shipping?
Yes. Customs forms require you to describe the item and its material composition. Leather, synthetic, textile, and rubber each fall into different tariff categories. Incorrect declarations can cause customs delays, returned packages, or unexpected duty charges for the recipient. Be specific — write “men’s leather dress shoes” rather than just “shoes.”
How do I ship shoes as a gift internationally?
Mark the package as a “gift” on the customs form and declare the value honestly. Many countries have gift exemption thresholds (for example, the UK allows gifts up to £39 duty-free). If you’re sending footwear as a gift for a special occasion, this Mother’s Day gift shipping guide has useful tips that apply to any gift shipment.
Should I get shipping insurance for shoes?
If the shoes are worth more than $75–$100, insurance is a smart call. It costs relatively little — often just $2–$5 for items valued under $300. And if the package gets lost or damaged, you recover the value. For high-end sneakers or designer heels, insurance isn’t optional — it’s essential.
Wrapping It Up
Shipping shoes safely really comes down to three things: stuff them well, double-box them, and choose the right service for your timeline and budget. It’s not rocket science, but the small details — the tissue paper layer, the right box size, the H-tape sealing method — make the difference between a shoe that arrives looking brand new and one that arrives looking like it survived a demolition derby.
Whether you’re shipping one pair to a friend or fifty pairs a week from your online store, these steps work every single time. Take five extra minutes to pack properly, and you’ll save yourself hours of dealing with damage claims, refund requests, and unhappy recipients.
Your shoes deserve to arrive the way they left — looking good and ready to wear.