
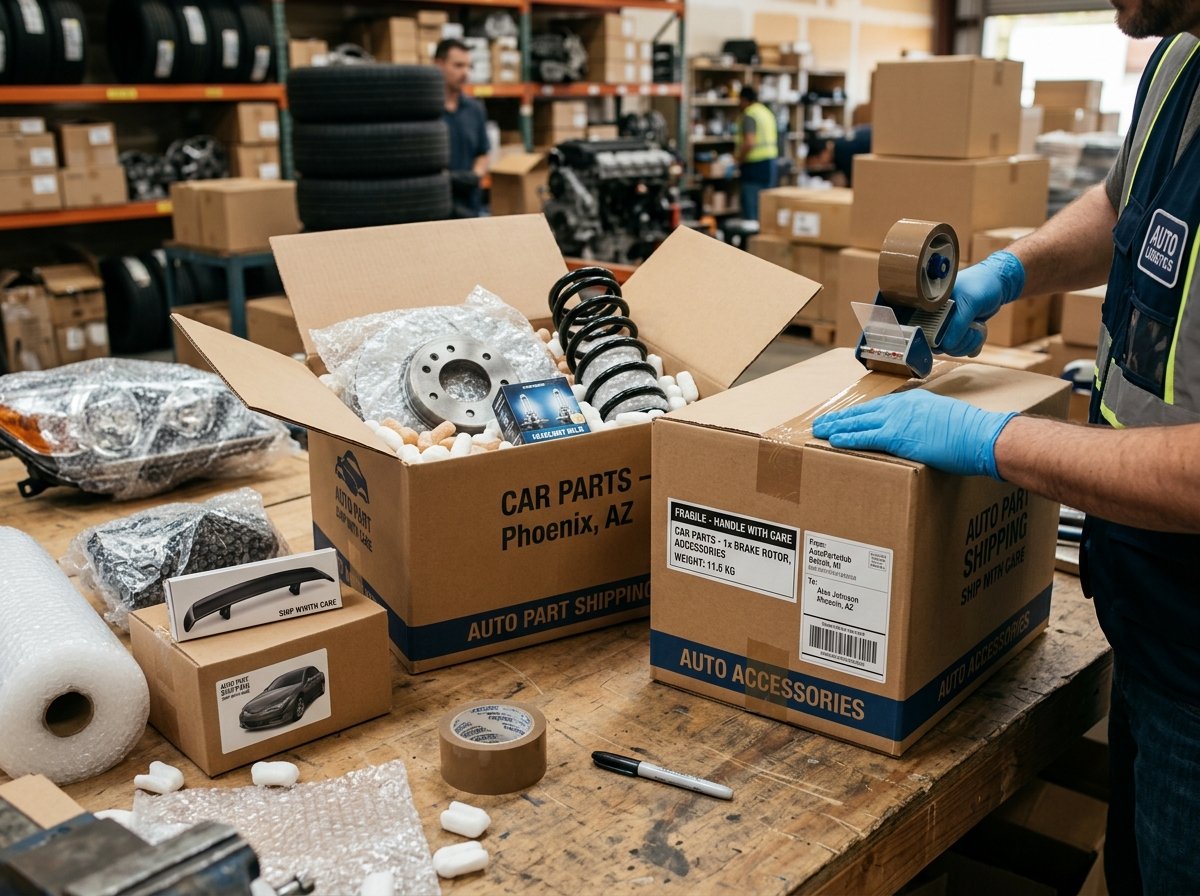
A single cracked bumper shipped in a flimsy box can cost you $300 or more in replacements. And the worst part? That damage was 100% avoidable. Whether you’re an online auto parts seller, a mechanic sending components to a customer, or someone who just sold a transmission on eBay, getting car parts from Point A to Point B safely is trickier than most people think.
Car parts come in all shapes, sizes, and weights. You’ve got tiny spark plugs, oddly-shaped exhaust manifolds, heavy brake rotors, and fragile headlight assemblies — each one needing a different approach to packing and shipping. Get it wrong, and you’re looking at damaged goods, unhappy buyers, insurance claims, and money down the drain.
This guide walks you through everything — from picking the right box and packing materials to choosing the best carrier and keeping your shipping costs under control.
Why Shipping Car Parts Is Different From Regular Packages
You can’t treat a car alternator like a pair of sneakers. Auto parts have unique challenges that regular items simply don’t.
Weight is the first big factor. A single brake caliper can weigh 10–15 pounds. A full transmission? That’s easily 100+ pounds. Most standard shipping boxes aren’t built for that kind of weight, so you need reinforced or double-walled corrugated boxes.
Shape is another headache. Many auto parts have irregular forms — think exhaust pipes, side mirrors, or control arms. These odd shapes make packing difficult because they shift inside boxes during transit, creating pressure points that lead to cracks or dents.
Then there’s the grease and fluid issue. Used car parts often have residual oil, coolant, or hydraulic fluid. If that leaks during shipping, it can damage other packages in the same shipment, and some carriers will flat-out refuse your package or charge you extra.
And here’s something many people overlook — certain car parts contain materials classified as dangerous goods with specific shipping rules. Batteries (especially lithium-ion ones from hybrid vehicles), airbag modules, and anything containing compressed gas fall under hazardous materials regulations. Ship these incorrectly, and you could face fines.
How to Pack Car Parts for Shipping — Step by Step
Packing is where 90% of shipping damage gets prevented. Spend an extra 10 minutes packing properly, and you’ll save yourself hours of dealing with damage claims later.
Clean Every Part Before Packing
This step is non-negotiable for used parts. Drain all fluids completely — transmission fluid, brake fluid, engine oil, coolant, everything. Wipe the part down thoroughly. Residual grease doesn’t just create a mess; it can weaken cardboard over time, making your box structurally fragile right when it needs to be strong.
For parts with threaded openings or ports where fluid could seep out, seal them with plastic caps or even heavy-duty tape. Wrap the cleaned part in plastic wrap or a large plastic bag as an extra layer of protection against any remaining residue.
Choose the Right Box Size
Here’s a rule that sounds simple but people constantly get wrong: your box should be 2–3 inches larger than the part on every side. Too tight, and you don’t have room for cushioning. Too big, and the part bounces around like a pinball.
For heavy parts (anything over 20 pounds), use double-walled corrugated boxes. Single-wall boxes will buckle under the weight, especially if another package gets stacked on top during transit. If you’re unsure about how to choose the right box size for your specific part, measure the longest, widest, and tallest points of the part and add those 2–3 inches of cushioning space.
For really heavy components like engine blocks or transmissions, consider wooden crates or palletized shipping. Cardboard alone won’t cut it for anything over 70 pounds.
Wrap and Cushion Like You Mean It
Different parts need different wrapping strategies:
Metal parts (rotors, calipers, engine components) — Wrap in anti-rust VCI (Vapor Corrosion Inhibitor) paper or bags first. Then add a layer of bubble wrap. Metal parts can rust during transit, especially on longer shipments where temperature and humidity change. You might want to check how much bubble wrap you actually need based on the part’s weight and fragility.
Fragile parts (headlights, taillights, mirrors, sensors) — These need serious protection. Start with a layer of foam wrap directly on the part. Then bubble wrap generously — at least two inches of cushioning on all sides. For glass lenses and reflective surfaces, add a layer of cardboard between the bubble wrap and the surface to prevent pressure marks.
Small parts (spark plugs, bolts, clips, gaskets) — Group similar items in zip-lock bags. Place these bags inside a smaller box, then put that box inside a larger shipping box with packing material between them. This “box-in-a-box” method is the gold standard for small components.
Oddly shaped parts (exhaust pipes, bumpers, fenders) — These are the hardest to pack. Use expanding foam packaging if you have access to it — it molds around the part perfectly. If not, use crumpled packing paper to fill every void. The goal is zero movement inside the box. Pick it up and shake it gently — if you hear or feel anything shifting, add more cushioning.
Pro Tip: Never let two metal parts touch each other inside the same box. They’ll scratch, dent, and damage each other during transit. Always separate them with cardboard dividers or individual wrapping.
Seal the Box Properly
Use heavy-duty packing tape — not masking tape, not duct tape, not that thin transparent tape from your junk drawer. Apply the “H-taping method”: tape along the center seam, then tape both edges of the opening. For boxes over 30 pounds, add a strip of tape across the center of both the top and bottom for extra strength.
For really heavy shipments, reinforce the corners with additional tape or corner protectors. Corners are the weakest points of any box, and they’re the first to fail during rough handling.
Labeling and Documentation — Don’t Skip This
A perfectly packed box means nothing if the carrier handles it wrong because you didn’t label it correctly.
Essential Labels
Mark your package with “FRAGILE” on at least two sides if it contains breakable components like lights, mirrors, or electronic sensors. Add “THIS SIDE UP” arrows for parts that shouldn’t be flipped — leaking is a real risk with components that might still have trace fluids.
If the part is heavy (over 50 pounds), add a “HEAVY” label. This isn’t just a courtesy — it tells warehouse workers to use proper lifting equipment, which protects your package.
Shipping Documentation
For domestic shipments, you’ll typically just need a shipping label with the sender and recipient details. But if you’re shipping car parts internationally, things get more complex.
You’ll need a commercial invoice or customs declaration that includes a clear description of the part (not just “car part” — write “Honda Civic 2019 left headlight assembly”), its value, the Harmonized System (HS) code for customs classification, and the country of manufacture. Auto parts have specific HS codes that vary by part type, and using the wrong code can delay your shipment at customs or trigger additional duties.
Different countries have different rules about what auto parts they’ll accept. For example, if you’re shipping to the US, UK, or Australia, you should be aware of the shipping restrictions to these countries before you send anything.
Choosing the Right Shipping Carrier
Not all carriers handle car parts equally well. Your choice depends on the part’s weight, size, value, and how quickly it needs to arrive.
For Small and Lightweight Parts (Under 10 lbs)
Standard postal services and economy courier options work fine for small items like filters, gaskets, spark plugs, or small sensors. USPS, Royal Mail, or your local postal service can handle these at reasonable rates. If you’re weighing whether to spend more on speed, understanding the difference between standard and expedited shipping can help you decide.
For Medium Parts (10–70 lbs)
This is where major carriers like FedEx, UPS, and DHL really shine. They offer ground and air options, insurance, and tracking. For most individual car parts — alternators, starters, pumps, rotors, control arms — these carriers are your best bet.
If you’re deciding between carriers for international auto parts shipping, a comparison between DHL and FedEx for international shipping might help you pick the right one based on your destination and budget.
For Heavy and Oversized Parts (70+ lbs)
Engines, transmissions, large body panels, bumpers — these need freight shipping. LTL (Less Than Truckload) freight carriers are the go-to option here. Companies like FedEx Freight, XPO Logistics, Old Dominion, and R+L Carriers handle oversized automotive shipments regularly.
Freight shipping works differently from parcel shipping. Your item goes on a pallet, and pricing is based on freight class (determined by weight, density, and dimensions), not just weight alone. Understanding how shipping rates are calculated will help you estimate costs more accurately.
Quick Fact: Most major carriers use dimensional weight pricing for car parts. That means if your box is large but relatively light (like a plastic bumper cover), you might pay based on the box’s size rather than the part’s actual weight. Check out how dimensional weight works so you’re not caught off guard by a higher-than-expected bill.
Shipping Costs — What to Expect and How to Save
Car parts shipping costs vary wildly. A small box of brake pads might cost $8–$15 domestically, while shipping a transmission cross-country could run $150–$400 or more.
What Drives the Cost Up
Weight and dimensions are the biggest factors — no surprise there. But many people forget about surcharges. Most carriers add fees for residential delivery, signature confirmation, oversized packages, and address corrections. These extras can add $5–$25 each to your total.
Distance matters too, but not always in the way you’d expect. Ground shipping across a state might cost barely more than shipping across town because carriers batch shipments along set routes. But add an air segment, and costs jump significantly.
Smart Ways to Cut Costs
Trim your box size. Even removing one inch from each dimension can drop your dimensional weight enough to move you into a cheaper rate tier. Don’t use a massive box for a small part just because it’s the box you have available.
Compare quotes before you commit. Get rates from at least three carriers. Online shipping comparison tools let you input dimensions and weight and see rates side by side.
Ship ground whenever possible. Unless your buyer needs the part urgently, ground shipping offers significant savings over air with only a few extra days in transit.
Buy shipping supplies in bulk. If you regularly ship car parts (sellers, mechanics, salvage yards), buying boxes, bubble wrap, and tape in bulk cuts your per-package cost dramatically. Look into eco-friendly packaging options too — recycled materials are often cheaper than virgin packaging, and customers appreciate the effort.
Insurance — Is It Worth It?
Short answer: Yes, almost always.
Here’s why. Car parts aren’t cheap. Even a basic OEM headlight assembly can cost $200–$500. An ECU module? $500–$1,500. If one of these gets damaged during shipping and you don’t have insurance, that loss comes straight out of your pocket.
Most carriers include basic liability coverage — usually around $100 for domestic packages. But that’s rarely enough for auto parts. You can purchase additional insurance for your shipped packages through the carrier or third-party providers like Shipsurance or ParcelGuard, often for just 1–3% of the declared value.
Warning: If you need to file a claim later, you’ll need proof of the part’s value (purchase receipt, invoice, listing screenshot) AND proof that you packed it properly (photos of the packing process). Take pictures before you seal the box. Carriers routinely deny claims if they determine the item was inadequately packed.
Special Considerations for Different Types of Auto Parts
Batteries (Lead-Acid and Lithium-Ion)
Car batteries are classified as hazardous materials by IATA (International Air Transport Association) and DOT (Department of Transportation). Lead-acid batteries can leak sulfuric acid. Lithium-ion batteries (common in hybrids and EVs) can catch fire if damaged.
You must use UN-certified packaging for battery shipments. Terminals need to be covered with non-conductive caps or tape to prevent short circuits. Many carriers won’t ship batteries via air at all — ground only. And some carriers simply refuse battery shipments from individual shippers, allowing them only from certified hazmat shippers.
Airbag Modules and Pretensioners
These contain explosive charges — yes, actual small explosives. They’re Class 9 hazardous materials for shipping purposes. You’ll need proper hazmat documentation, approved packaging, and a carrier that accepts them. Don’t try to sneak these into a regular shipment. If an airbag deploys inside a delivery truck, you could be held legally and financially responsible.
Body Panels and Bumpers
These are large, lightweight, and awkward. Custom cardboard or foam packaging is usually necessary. For painted bumpers or fenders, surface protection is critical — even a small scratch makes the part unsellable. Use furniture-grade moving blankets or thick foam sheeting against painted surfaces, then wrap the whole thing in cardboard.
Electronic Parts (ECUs, Sensors, Modules)
Static electricity can destroy electronic components. Always pack these in anti-static bags (the silver/pink ones you’ve seen computer parts in). Then cushion with non-static-generating materials — no styrofoam peanuts, which create static. Use anti-static bubble wrap or foam instead.
Tips for Online Sellers Shipping Auto Parts
If you’re running an auto parts business on eBay, Amazon, or your own website, shipping efficiency directly impacts your profit margins and customer reviews.
Be extremely specific in your listing descriptions. Include the OEM part number, compatible vehicle years/makes/models, and the part’s condition. This reduces returns caused by buyers ordering the wrong part — and returns in auto parts are a real headache. Speaking of which, having a clear process for handling returns in your online business will save you a lot of stress.
Offer realistic shipping timeframes. Don’t promise 2-day delivery on a heavy part that’s going across the country via ground. Under-promise and over-deliver — customers would rather receive their part earlier than expected than later.
Build shipping costs into your pricing strategy. Free shipping sells more products, but you obviously can’t absorb the cost of shipping a 40-pound part for free without adjusting your price. Calculate your average shipping cost per item category and factor it into your product prices.
Photograph everything before shipping. Take clear photos of the part’s condition and your packing process. If a buyer claims the part arrived damaged, your photos are your evidence. This protects you during disputes and insurance claims.
Common Mistakes That Cost People Money
Using the wrong box material. Reusing an old Amazon box for a heavy engine component is asking for trouble. Those boxes are designed for lightweight consumer goods, not a 25-pound starter motor. If you make common packaging mistakes that damage parcels, you’ll end up paying for it through replacements and lost customers.
Not draining fluids from used parts. We mentioned this earlier, but it’s worth repeating because it happens ALL the time. Carriers can refuse your package, charge cleanup fees, or hold you liable for damaging other shipments. Drain and clean every used part thoroughly.
Under-insuring high-value parts. People ship a $600 turbocharger with default $100 coverage and then act surprised when the carrier only reimburses $100 for a damage claim. Spend the extra few dollars on proper coverage.
Ignoring dimensional weight. You ship a lightweight plastic grille in a huge box and get charged based on the box’s volume, not the grille’s actual weight. Always use the smallest box that still allows proper cushioning.
Writing vague customs descriptions for international shipments. “Auto parts” as a customs description will get your package flagged, delayed, or returned. Be specific: “Aftermarket aluminum radiator for 2020 Toyota Camry, new, $185 value.”
FAQ
Can I ship a car engine through regular courier services?
Most standard courier services like FedEx, UPS, and DHL can handle car engines, but they typically treat them as oversized/overweight shipments with additional surcharges. For engines over 150 pounds, LTL freight shipping is usually the better (and cheaper) option. You’ll need to drain all fluids, bolt down any loose components, and ideally mount the engine on a pallet secured with ratchet straps.
Do I need special packaging for shipping used car parts?
Used parts require extra attention compared to new ones. You need to drain all fluids, clean off grease and grime, and wrap the part in plastic to prevent residue from weakening the box. For metal parts, use VCI (Vapor Corrosion Inhibitor) paper or bags to prevent rust during transit. Beyond that, the standard packing rules apply — proper cushioning, right-sized box, and secure sealing.
How do I ship car parts internationally?
International auto parts shipping involves customs paperwork, HS code classification, and compliance with the destination country’s import regulations. Some countries restrict or heavily tax certain automotive components. You’ll need a commercial invoice, accurate part descriptions, and proper hazmat documentation if you’re shipping batteries or airbag components. Using an established international carrier like DHL or FedEx simplifies the customs process since they handle brokerage for you.
What car parts are restricted or banned from shipping?
Airbag modules, certain batteries, parts containing refrigerant (like sealed A/C compressors), and any component with flammable fluid residue face shipping restrictions. Catalytic converters also have legal restrictions in many regions due to theft concerns — some carriers require proof of legal ownership before accepting them. Always check with your carrier’s restricted items list before shipping.
Is it cheaper to ship car parts via ground or air?
Ground shipping is almost always cheaper — sometimes 40–60% less than air shipping for heavy auto parts. The trade-off is speed: ground shipping within the continental US typically takes 3–7 business days, while air can get it there in 1–3 days. For most car parts, unless it’s an emergency repair situation, ground shipping makes financial sense.
Your Next Move
Shipping car parts doesn’t have to be stressful or expensive. The key comes down to three things: clean and prep the part properly, pack it with the right materials in the right-sized box, and choose a carrier that matches the part’s weight, size, and delivery timeline.
If you’re shipping auto parts regularly — whether as a business or a side hustle — build yourself a simple checklist based on the steps above. Stick it on the wall near your packing station. It sounds basic, but having a repeatable process prevents the kind of careless mistakes that lead to damaged parts and frustrated customers.
And one last thing — always, always take photos before you seal that box. You’ll thank yourself the one time you actually need them.